Test Blog: Kids Craft Supplies

Hot

Post Top Ad

Your Ad Spot
Showing posts with label Kids Craft Supplies. Show all posts

Tuesday, November 22, 2016

No Cook Play Dough Recipe - Easy Peasy Play Doh Recipe

8:16 AM 4

My little one loves play doh. I used to buy it at stores very often, since my little one throw it at random places and when i find those, it is hard and unusable. So i have to keep buying it often, which i found a waste of money. So i decided to make it at home.  I would say this is a fool proof recipe and it is just amazing. I have once made a cooked version, this one is more easy that that. Plus you have the satisfication that it is kids friendly. 

Even if you have the toddler who puts everything in mouth, this is completely safe. In that case you can use food grade food colour, i used painting colours. This play doh is so soft, easy to work with, long lasting and kids friendly. Hope you will give this a try and let me know how it turns out for you.

CHECK MY COOKED PLAY DOUGH AS WELl
ALSO READ:
HOMEMADE BINDI FOR BABIES
HERBAL BATH POWDER FOR BABIES
BABY FOOTPROINT AND HANDPRINT KEEPSAKES


Preparation Time : 10 mins

Ingredients:

All Purpose Flour / Maida - 2 cups
Salt - 1 cup
Vegetable Oil - 2 tblspn
Water as needed
Colours as needed

Method:

Take flour, salt, oil in a bowl and mix well using a fork. Add water slowly and knead to a soft and smooth dough.

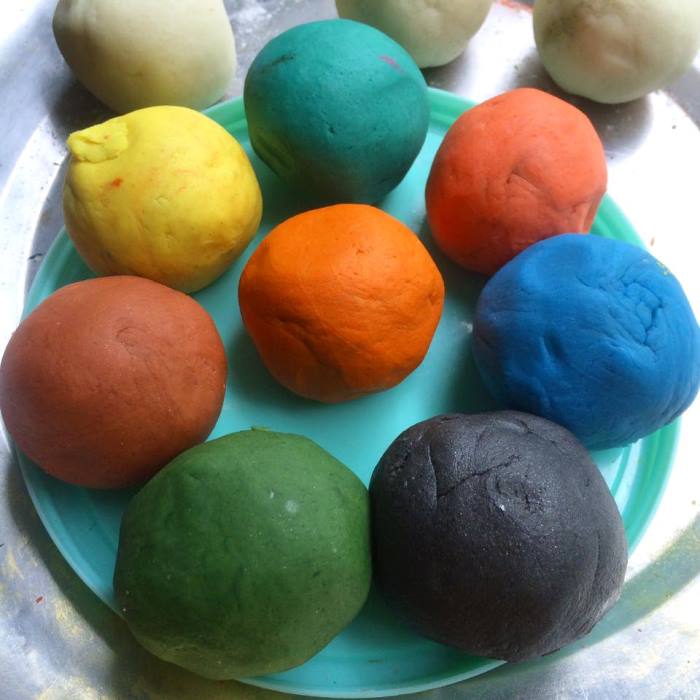
Now divide it into equal portions and add food colour to them and knead well.

Store this in air tight container.

This will last for 4 to 6 months.

Notes:

1)Use individual container for each colour, this will prevent staining.

2)After playing, store it in a closed container.
3)If it gets dried, add few drops of water and knead well. So it gets soft again.
4)This will last for many many months, even years.

Pictorial:
Take All purpose flour in a bowl 
add salt


add oil

rub it well

add water

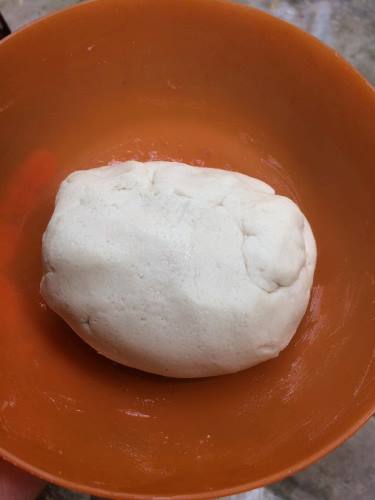
knead to a stiff and smooth dough

divide it into equal portions

Since my little one wont put this in mouth, i used these painting colours..
If you are making for younger kids use food grade colours

add small amount in this

knead well

Done

THIS CAN BE STORED FOR MORE THAN 4 TO 6 MONTHS IN A AIR TIGHT CONTAINER AFTER PLAYING

Read More

Sunday, May 29, 2016

How to Make Slime (DIY) - Fool Proof Homemade Slime Recipe - Homemade Ooze Recipe

8:29 PM 3

My little one used to see these slime videos in youtube. People used to play with it and she really enjoy seeing those videos. Oneday she asked me "Amma, Can you buy me this". I searched all over the internet and all those recipes calls for borox. In my place i couldn't get it, so i ordered it online.

BUY BOROX FROM EBAY

OR

GET IT FROM AMAZON


The recipe is pretty simple to make. It calls for just few ingredients and when you mix all these together you get this beautiful strechy slime which even adults love it.


Hope you will give this a try and let me know how it turns out for you..


Preparation Time : 5 mins

Ingredients:


Borox Powder - 1 tsp
Glue - 120 grams ( i used fevicol white)
Food Colourings
Water - 1 cup + 1/2 cup

Method:

Take borox and 1 cup water in a bowl. Mix till borox is melted. Set aside.

Take glue and 1/2 cup water and mix well. Add food colour and mix well.

Now add the borox mix and mix well. It will form slime.

Remove slime using your hands and work it gets piliable. As you work it will get nonsticky.

Now knead for few seconds.

You can store this in a air tight container or ziploc bag.

ALSO READ:
HOMEMADE PLAYDOH
HOMEMADE BINDI FOR BABIES
HERBAL BATH POWDER FOR BABIES
BABY FOOTPROINT AND HANDPRINT KEEPSAKES
RAINBOW CRAYONS

Pictorial:
You need borox


Take all your stuffs


take borox in a bowl


add 1 cup of water


mix till borox is melted. Set aside


Take a good quality gum..i always use this brand


pour it in a bowl


add in half cup of water


add few drops of food colour


mix well


add borox solution


mix well


it will start to form slime


now it is almost done


remove it


keep working it


the water will be absorbed and it will get strechy


you can knead for few seconds


done..Store it in a air tight container or ziploc bag for years.

Read More

Thursday, May 19, 2016

How to Make Rainbow Crayons - DIY Rainbow Crayons

8:29 AM 0

I came across this idea in pinterest and immediately it made me try. I had lots of bits and pieces of crayons lying around the house. I used all those to make this colourful rainbow crayon. 

ALSO READ:
HOMEMADE PLAYDOH
HOMEMADE BINDI FOR BABIES
HERBAL BATH POWDER FOR BABIES
BABY FOOTPROINT AND HANDPRINT KEEPSAKES


This is such a easy and fun project to do with kids. My lil one helped me in this and she loved it so much, now she is using this to colour her books.


Hope you will give this a try and let me know how it turns out for you..


Things you need:

Crayons - different colours

Silicon Moulds or Cupcake Tray 

Method:

Preheat oven to 170 degree C. 

Peel the paper off the crayons and break them into small pieces.

Fill them in muffin moulds, makes sure you different colours are placed in each moulds.

Now pop this in oven and let it bake for 10 mins. Now the crayons must be melted.

Now remove this and cool this on counter for 10 mins.

Now put this in fridge for 10 mins.

Unmould. 

This can be put in a glass jar for decorations or wrapped in covers and can be given as gifts. You can colour using this as well

Pictorial:
Remove the paper from the crayons

maha helping me in this

break it into small pieces

i used these individual silicon moulds

fill each one with diff colours

done

i placed them in a plate and popped them in oven

now it is all melted..set aside for 10 mins and put them in fridge

now it is solid

if you use silicon moulds, it will be easy to unmould

DONE

Read More

Search This Blog

Post Top Ad

Your Ad Spot